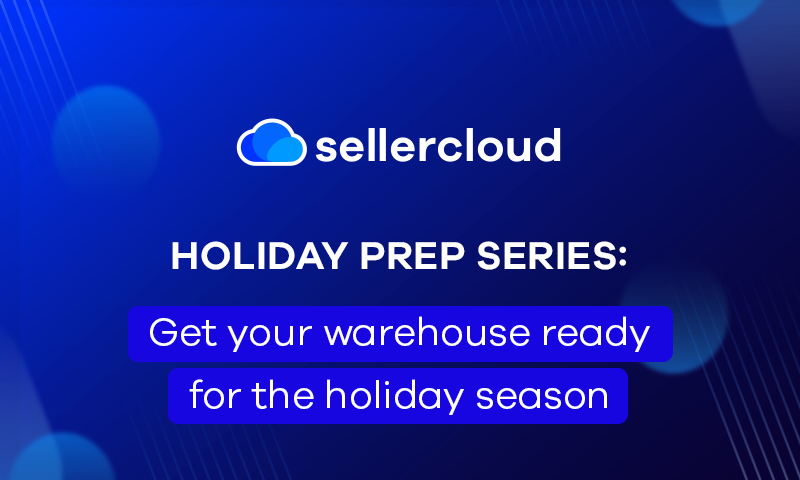
Holiday Prep Series:
Make the most of your marketing
The second webinar of our Holiday Prep Series will help you get the most of your marketing strategies to boost your holiday sales.
How to prepare listings for your marketplaces
- Posting to Amazon
- Posting to Walmart
- Posting to eBay
- Posting to your Website
- Managing Product Types
- Bulk updating/editing products
- Monitoring your listings
Maximizing your digital footprint with product relationships
- Building kits and bundles
- Creating variation listings
- Setting up shadow SKUs
- Managing conditioned SKUs
Managing holiday promotions
- Understand your profitability with Sellercloud reports
- View sales comparisons from previous years
- Set up promotions on a SKU level
- Manage bulk pricing updates
- Work with marketplace repricers
- Integrate 3rd party repricers with Sellercloud
Setting custom inventory rules to limit overselling
- Safety quantities
- Max quantity enabled
- Channel quantity
- Replenishable SKUs
- Channel warehouse mapping
- Shipping templates
Optimizing Amazon Ads with Clocklocked
- Get live stats on your ad campaigns
- Post new sponsored products ads
- Set hourly, daily, weekly, and monthly budgets
- Reallocate unspent budget to maintain ad presence
- Manage multiple Amazon ad accounts in one place
Webinar Transcript
Gary Basko
All right. Good afternoon, and thank you, everyone, for joining the second installment of our Holiday Prep Series webinar. I have my colleague and fellow account executive, Rick Gandhi, here with me today who will be taking you through a tour on our posting tools and showing you all of the ways to help get your catalog ready for this holiday season.
I will also be going through one of our latest additions to the Sellercloud family, that’s going to be Clocklocked to talk about the PPC capabilities with the Amazon, the Walmart side of things that we’ve recently added. And then afterwards we will also have a Q&A session. So please feel free to add any questions into the chat below. Without further delay, I’m going to go ahead and let my colleague Rick take it from here.
Rick Gandhi
Hi everybody. How are you? As Gary said, my name is Rick Gandhi. I’m an account executive here at Sellercloud. Gary, thank you so much for the wonderful introduction. Those of you who joined our first holiday, prep session, I hope that was very helpful. So today, we’re just going to go through your catalog, right, so we’re getting ready for the holidays. You guys have a lot of products on certain channels, trying to expand to other channels, preparing those products to get them posted on to, let’s say, from Amazon, Walmart and eBay. Let’s go ahead and get started and we’ll take it step by step.
So obviously, the first step, what we need to do is create a new product right. So we have three different methods that we can use to create a new product. So when creating a new product you go into a catalogs module on Sellercloud. You go to add new product. And from here it shows you three different ways that we’re able to add a new product. Now we have creation via channel. We have create products individually, which by default in Sellercloud all that’s needed to create a product is just a product, name and SKU.
Now if you have certain identifiers or certain fields that you would like filled by your employees and create a new product, you can click the little settings icon here, and you can go ahead and mark them to show them in the form when they need to create a new product, and also you can make them are they required or not in order to create a new product as well. Now, like I said, the basic things that you need is just the product name and SKU. And we also have the bulk import right where you can generate a template and import products in bulk. So for a lot of resellers, the creation via channel is an easy way of creating a new product where we can actually go to a channel, for example, Amazon. We can type in a keyword, we can actually take the Amazon URL and actually pull in the product information from other listings already on Amazon.
So perfect example. Let’s just go ahead and create a new product. So right now fall is right around the corner. So let’s search for some pumpkin decor. And two fields do pop up. We have local products, which are products currently in my catalog. As you can see I do have none. And then I have Amazon products or anything that’s related to this keyword. Now obviously in the keywords, the more detailed keyword you put in there, the better results that you will get what you are looking for. Whether it a UPC, an ASIN or anything of that nature. So let’s just go ahead and create a product. I’m going to create this top product right here, and once again a SKU is required in Sellercloud as we call it a product ID in order to create one. So I’ll just put in Webinar Test 1 and I’ll add the product in there.
And once the product is created we can actually search for the product in our universal search bar right here. So webinar test it’s going to pop up and let’s see what we actually pulled in. So like I said we can actually pull in product information from different listings from Amazon itself, and we, as you can see, on the homepage, we pulled in the images, we pulled in some of the metrics and information. And now let’s go ahead and actually post to Amazon itself. So let’s say I have this product right here, or even if it’s a brand new product that never, that’s currently not posted on, on Amazon, I actually can do that as well.
So the number one thing, in order to post a product on Amazon, we have every single channel has ‘Ready To Post,’ right, and currently it says no. If I hover over the tooltip,it will actually tell me exactly what I’m missing in order to get this product posted onto the channel I’m trying to post onto. Now, this one is saying the product type is not defined, description is not defined, and the attributes are not defined.
So we also have the ability now to create a new ASIN in Sellercloud as well. So this one obviously already has an ASIN, however, if I go to my configure attributes under my listing details right here, I can click edit, Configure Attributes, and I can select my Amazon category that I’m actually trying to find. So I just type in decor. Right. So I’ll just put in any category right there and let’s see what pops up.
Now we have this little checkbox right here that says show required attributes only. Now this is only going to show me what’s required for me to complete, to fill out, in order for me to have the ability to post it onto Amazon. Right. So once I get all these filled out, all the ones that are required right here, I can click SAVE & VALIDATE and I can SAVE & CLOSE. Now, once I do that, let’s say I don’t have an ASIN currently and I need to get an ASIN as well, the same process would apply. I can go to Actions and actually I can post a product on Amazon, and this product will be sent to Amazon and automatically an ASIN will be created for this product as long as I have all the required information. Once again, if you’re not sure if you have the required information, the best place to look at is this ready to post tooltip right here to tell you what is actually required.
Now let’s say I’m trying to get this product onto Walmart. Same type of thing would go. Now we have two different ways of actually posting on Walmart. The first way is very similar to the way I did for Amazon actually. So once again we have this Ready To Post right here. Right. And it’s telling me what is required. My site price is not there right. My Walmart categories are undefined and my attributes are not selected. So I can also click Edit under my listing details right here. I can go to my attributes and I can actually select an attribute. And this right here too is where I can also get the attributes. Now we have this recommended fields for creating listings with this little star right here.
Now since recently Walmart did update their 5.0 specs for their attribute fields, we are in the process of currently updating that on our side as well. We’re just putting some tweaks into it, and that should be very similar to the way we saw Amazon’s, where you can say show only required and only the required fields will be shown on here as well. And once I finish this, once I get all the complete information that I need, then I can go ahead and post the product directly onto Walmart from here.
Now we also have another way of posting onto Walmart too. We have something which is called set up by match. Now set up by match is very similar to the way I created a product from the Add New products creation via channel. Now there are certain requirements for setup by match on Walmart. I need certain specific information in the actual product. So one thing that we do need, of course, we need to make sure that the product is enabled for Walmart. Another thing that we need is to make sure that we have a Walmart price for this as well. We need a product identifier. Now my product identifier is the UPC so I would need to put in a UPC in this field.
I can also choose between the EAN, GTIN, or the ISBN. And lastly we do need the shipping weight and dimensions. Now once I have mainly the product enabled for Walmart, the price, the shipping weight, dimensions and the identifier, then we can go to the Actions, search for setup by match and we can post to Walmart using set up by match. Now what this does is this takes with limited information in Sellercloud, this can actually look for another listing and take the information directly from another listing on Walmart, and use that information to post this product onto Walmart from your catalog.
Now let’s move on to our next channel and our next channel we can try posting onto eBay, right. So now eBay doesn’t have certain attributes, they called them item specifics, right. So they have eBay categories and item specifics. Once again, same scenario goes. I can go to this ready to post tooltip and I can see what I’m currently missing. I’m missing my categories. I’m missing a description. I’m missing my start price. Now I can go from here. I can go to my listing details once again. I can edit my eBay categories from here. I can edit my item specifics directly from here. I can say, okay, what specifics, what categories do I want to select? I’ll just go to, let’s say, collectibles, advertising, agriculture, and I can select whichever one and it’ll pop up over here and I can hit next. And this will say what’s actually required.
Now currently on here I have my brand. There’s other things that you can click, you can take and even edit custom specifics on here as well. And if you hit refresh, items from eBay will actually pull in the most updated recent items from eBay as well. And then once again, you can go to your Actions. You can go and you can list on eBay directly from here.
Now let’s say you have your own website, whether that be a BigCommerce, a Shopify, or your own website as well. We also we can go to our website properties page and we can do the same thing. So from here too, the same scenario goes. Ready To Post. You can go in, go and change your short description, your long description. You can click Edit and you can update all this information right here and then you can post as well.
Now once we get all the listing details when it comes to descriptions, the bullet points, the attributes, once all that is updated, I’m sure you want to deal with the images as well. Now we do have our image manager for each product that we have where you can import images, or you can upload images from your desktop computer, and you can select and choose which images you would like to post onto which channel. Now, under each channel properties page, you will see what images are specific to that channel as well. Now you can have all the images going to all the channels.
Now one other thing I do want to mention, another product that Sellercloud has with our entire, full product catalog that we do have, we have something called Imagebridge. Now, Imagebridge is a, if I click into it, it is actually allows you to upload easily, allows you to edit your products, and it allows you to search by SKUs. Since it is connected to Sellercloud, you can drag and drop images into Imagebridge. It’s kind of like a library for your images for your products. So that is also something to talk to your rep about if that’s something you’re interested in, is Imagebridge.
All right. So now that we talked about posting to the different channels, let’s talk about product relationships right. So now with product relationships we do have quite a few different relationships. So let’s go to the main page right here. Now we have something which are called Shadows right. So if I go to my toolbox and just type in shadows. Now Shadows are basically mirror images of the main parent product. Now as you can see it says I can do this individually by assigning parent products, and I can add child shadows to this as well. Now a shadow allows me to have duplicate listings on the same marketplace. However, it also allows me to have the inventory in sync across the board. So if I have the same physical product in my warehouse, however, I want to list twice on the same marketplace, the physical inventory would be the same, so I have two chances of selling and getting two chances of sales instead of just one. However, the inventory will always be the same, so I know I cannot oversell.
Another relationship that we do have is variations. Variations or something for the extent of let’s say I’m selling T-shirts and I have, for variations, we have something which we call our dimensions and values right. So the dimensions is basically the category. So for example, if I’m selling T-shirts I would have color and size, and then I would have my values as the different sizes and the different colors. So for this product right here, let’s say I do have different sizes, I select this dimension that I do have right. I select the I go next to the combination and will spit out my combinations that I have. So for example, I can have my child SKU. So I have my parent SKU, which is webinar test, I have my child SKU which is webinar test, and the size would pop up because this is the size dimensions that the combination that I selected and each and every single child variation SKU can have its own images, and I have its own inventory as well with its own description, and it’s basically its own child SKU.
The last product relationship that we do have is a kit or a bundle, right. So a lot of people they sell two packs, three packs or they sell multi-item kits. So what we can do is I have my parent, which is right here, and let’s say this is a kit, let’s say inside of here we made it pumpkins right, I pulled in pumpkins. Let’s say I have a set of different types of pumpkins. I can add the components directly from here and I can say, okay, I want to add this SKU into here, a webinar test. I’ll just add this SKU. Add selected and my components would actually come up. Now we have a quantity in kit. So currently I have my parent SKU, and inside the for the components I only have one, one component.
Now for the component, in order to make this a kit I’ll say it’s a two pack. So I have a two pack. If I sell this kit it is going to be a two pack of this SKU right here. Now we have three different types of kits for the dependencies, right. We have an independent kit which a lot of people may know that FBA requires independent kits, which pretty much means just preassembled kits being sent out and what I have available in my inventory as a preassembled kit. The other kit dependency that we have is an all components kit. Now all components kit means that I have the ability to sell this product in multiple different ways. Well, it takes into account the inventory of all the individual components.
And the last one that I do have is a main components kit. So for example, if I do have another product on this as well. I can see the inventory that I have available, and I can select one of these components to be the main component, which would mean that if I select this product right here, C71 as my main component. on the channel itself, it would show the quantity of the main component to be available for sale. So I would do that if I know I have this product coming into my warehouse from a supplier very soon. So I don’t want to lose out on sales. So I know that I can still have the higher quantity available shown on the channel that’s available for this entire kit.
Now, another thing that I wanted to mention to you guys is that we have something which are called product types. Now product types under your catalog module. If you go on to product types, you have multiple different product types that I have. So I have currently I have apparel, for example, right. Now product types can be used for multiple different reasons, right. It can be used for internal filtering or organizing your catalog. It can be also used for automations when creating new listings easily. When you create a product type and assign a product type to a certain product, certain fields can be automatically defaulted for that product type.
And the last thing is going to be for channel attribute mapping, right. Where we can actually map the Sellercloud properties to channel specific fields. So let’s click into I want to show you what I actually mean. So when I clicked into a product type, as you can see I have my Amazon default where I can select the Amazon category, the Amazon subcategory, the eBay defaults as well, and of course I also have my Walmart. Now once again I mentioned the 5.0 specs which we are updating as well, and we will have this updated to. Now you can select all these website categories, the Walmart Marketplace category, and you can actually map accordingly, if you go to your actions channel attribute mapping, and this will actually pop up. So this will actually map according to either custom columns that you have created inside of Sellercloud or Sellercloud columns itself, and you can map it to the channel attribute as well. So when creating the product types, if you have if you select the part type for a certain product, it can be mapped for the attributes across multiple marketplaces.
All right. And now that I did go over the different listing options on posting on multiple different channels, I do want to show you guys, we have the ability to do this in bulk. So if I go to my Manage Catalog page, right, and if I just hit search for all my products, I will type in a keyword just to make it easier to look at certain products that I have. So these products right here, so let’s just say I want to adjust certain categories. I want to edit these products in bulk. I can actually select all these four products right here. I can go to my actions bubble at the bottom and I can type in bulk edit. If I select the bulk edit, for these selected products, I can actually edit some of these fields for all the products at once. So have your Amazon category, the brand. You can do the manufacturer for eBay categories. You can update all these products that you selected in bulk directly from the Manage Catalog page.
Now along with doing that in bulk, for example, the shadows that we created earlier, so if the reason why we would if I want to create multiple different listings of the same marketplace, if I need to create shadows for these as well, you can also do that in bulk as well. So I can just select Create Shadows. It’s going to ask me if I want to add a suffix or a prefix. And I can select the company that I want the shadows created for and hit create and will create the shadows for me as well.
And now I want to show you guys you’re also able to have certain product conditions right. Product conditions for certain channels for certain channels we can actually go to the settings, under settings, we can go to our products, conditions, and this is where I can see my internal condition name, and I can have it mapped accordingly to the Amazon eBay condition as well. I can add a new condition, and I can say I can make my own current condition, for example, like let’s say grade C, and then I can map it accordingly to the Amazon condition and the eBay condition, among other channels as well.
All right. And now that we’ve gone through the conditions and now we can go towards the, so we actually have, I’m sure there are some sales comparisons where you guys would like to see where certain customers like yourself would like to see certain comparisons of sales between products. So we have lots of different reports in Sellercloud right.
One report that we do have under our sales reports, we have the sales comparison in detail. So this can actually show me sales, for certain products that I have sold over the last couple of years. So for example, I have my products right here, my SKUs, my product names. I can see how much I have sold and my grand total. Now I currently only have it for 2024. Let’s say I want to compare this over the last couple of years. So I can say, okay, let’s go back two more years, hit search, and once this comes up, we can actually see what we sold in 2023 and 2024. So we can compare the two. We can see the increase. We can see the change. If we scroll down, we can actually see the totals at the bottom as well for what we actually sold. So this can help you determine what you did well the year before. Maybe what you need to reorder, be prepared for the holiday season for the upcoming holiday season, and maybe in that way you guys maybe, reorder the certain quantities that you need for certain products.
All right. So now I’m sure with the holidays coming up, you guys do have a lot of promotions, right? Maybe you have certain sales. You guys have, Thanksgiving Day sales, Christmas sales, all the holiday sales. So we can actually create promotions on a SKU level. So if I go into an actual product. So let’s go back to the product that we actually created before, and let’s go to Amazon. So you can create promotional pricing for each and every channel. So for example for Amazon, I can hit edit and I can actually create a special price. So currently let’s just say my price is $199. So $199, I’m going to have a special price. I’m going to put this on sale for $149. I can select a start date and an end date. So if I select the start date for today and my end date would be, let’s say Friday, this starting from today, it would be on sale for $149 as soon as a timer ends on September 20th, which is Friday at 12:00 am, the price will revert back to the original Amazon price. And that can also be done for eBay as well. We can do a start price for eBay as well on that to.
And along with setting promotional prices, we also do work with a lot of marketplace repricers and also integrate with many third party repricers as well. So if I drop down to this for pricing little tab under the pricing page in the, in the product itself, you can see one example, one repicer that we do work with is informed.co what you are able to set the min and max price on here too.
Now we also have the options to enable min and max selling prices for Amazon as well, along with eBay and for Walmart too. So once we deal with all the pricing scenarios for promotional pricing, the price, the repricers, we also have certain restrictions that you can set that will prevent from overselling for the inventory side of things. So if I scroll down inside the actual product itself, I scroll down to the inventory level of things. We have something which is called a safety quantity. So now for example, if I have in this product right here, if I have available quantity is 100. However, if I set a safety quantity of ten this will mean this will create a safety net for me. So it will only show on the channel itself that 90 is available for sale. Now, I would do that to prevent over selling so I have a just in case amount in my warehouse. So I show on the channel that ten less is always available for sale.
We also have a max quantity enabled. Now the max quantity enabled, this is an option where for example, even if I have 100 pieces of inventory in stock for this product, and I say max quantity is ten, it will always show ten is available on the channel. So for example, if I have 100 it will show ten. However, if I go below that threshold of ten then we’ll go below the ten. This comes in handy, it kind of sets like a sense of urgency. I’m sure when people purchase airline tickets, they always see one seat available. It’s kind of like that scenario.
Now for inventory restrictions, we also have something called channel warehouse mapping right. So we can set restrictions according to a channel and warehouse level. So if I go down to my settings, and I go into my company and in my toolbox. Type in channel warehouse. Right. So in my channel warehouse mapping, I can see my all my channels that I currently have. So let’s say Amazon for example I can hit edit, I can select my warehouse that I do want to restrict this for, restrict the inventory usage. And I can say only show 75% of my inventory on Amazon right. But then I can go down to eBay, I can select the same warehouse and I can say only show 25% of my warehouse, right. For inventory that’s available in my warehouse. So I can do the same thing for Walmart and I can show 100% that’s available on Walmart, if Walmart is my hottest selling marketplace.
And so there’s many different ways of restricting the inventory in Sellercloud to prevent overselling, because overselling is always an issue. We want to make sure, especially during the holiday time, we want to make sure we are able to fulfill every order that comes into our system. So I hope I was able to give a good brief understanding of how to post certain products to Amazon, Walmart, and eBay, the different product relationship that we do have, and also the ability to see the inventory restrictions, the promotional pricing and the different scenarios that you guys would be able to use in Sellercloud in order to get ready for the holiday season.
And I do believe that’s all for me. Gary actually has great Clocklocked information that’s coming up with our new product for advertising details, and I think I’ll let Gary take it over from here.
Gary Basko
Awesome. Hey Rick, thank you very much. That was a fantastic presentation. I hope everybody was able to learn a ton about our product posting capabilities. I did see a couple of questions come in as well during the presentation. Just to let you know, we’ll make sure to get through those, right after we’re done with the Clocklocked side of things.
So, let’s go ahead and jump into Clocklocked. I’ll start sharing my screen. Now, for those who don’t know, Clocklocked is the PPC tool. So that’s what’s going to be helping managing your Amazon ads and the Walmart ads inside of, or when you’re using, say, Sellercloud in tandem with Clocklocked. There is a free version of Clocklocked as well that any Sellercloud customer will have the ability to sign up for. The free version of Clocklocked simply comes with a single Amazon account that you’ll be able to connect in there. If you’re looking to add multiple Amazon accounts, or you’d like to also connect with the Walmart Connect side of things, you would have to go and upgrade to the Pro version. However, the free version does come with a single Amazon account and some really cool reporting capabilities.
So, inside of the free version, you’re going to be able to see things like your sales and your costs, against that, that you’re going to be dealing with when you’re going and, managing the actual campaigns for Amazon inside of Clocklocked. You’ll also be able to get things like your ACOS and ROAS. You’ll be able to set those different goals as well, depending on the targets that you’re looking to make on these campaigns, what you’re looking to make on the margins and everything, versus the ad spend that you’re putting towards these different products. And you’ll also be able to see individual campaign data as well inside of there. Again, this is all part of the free version. You’ll be able to look at things like your daily reports, your costs, your clicks, your cost per click, your impressions and sold quantity, and the sales dollar amount against these campaigns each day.
For the free version, it does tie into your Sellercloud reports, specifically the profit and loss report, so that you can get a better idea and actual margins inside of your system. We do take that Amazon ad spend that we are collecting in Clocklocked and we apply it in the P&L report. To specifically find that P&L report where you’re going to have the ad spend applied to it, we’re going to be going into the product profit summary or product profit details report. We’re going to be looking at date type specifically is transaction. This is going to be adding any of the non order related transactions inside of Sellercloud that we’re pulling in to the actual P&L report, and then we’re going to go ahead and grab a date range here. And then from here is where we’re going to be able to get a bunch of other information, based on what we’re selling, so we can get a more accurate profit margin on these different products over that time period.
As for where you’re going to be seeing those under what headers for the ad spend, it comes under other channel fees inside of the system. For when you’re looking at and seeing what type of costs versus what type of campaigns you’re managing. Now with the paid version of Clocklocked, you’re going to be able to integrate up to ten Amazon or Walmart accounts inside of there, to be able to deal with reporting, and then it also gives you some functionality on the Amazon end to actually manage and adjust the campaigns. So under the campaigns tool, you’ll be able to create new sponsored products. Right now we’re handling just the sponsored products side of things for when we’re adding new campaigns. We are adding in things for display and brand ads as well in Clocklock, for managing and posting those.
But you’ll be able to create new sponsor product campaigns right from Clocklocked, choosing the targeting type, setting your budget, start and end dates, and the type of strategy. Do you want Amazon to be managing, or do you want to be setting your own different placement multipliers on there? And then from there, you can go ahead and do what Clocklock is truly made for, and that is when are we stopping and starting the budget inside of the system. So I have all of these campaigns. We can turn them on and off. We can do this manually, or we’re going to be able to set up a bunch of different business rules inside of the system.
So we have hourly budgets, daily budgets, weekly, monthly budgets that you’re going to be able to set up. You’re going to be able to set up the different time periods. You’re going to be able to set up different percentages of what you want on each of these individual time periods, for how much a budget you want to spend, the different bid ranges you would like to have this in, depending on, say, the different type of campaign types that you’re going to be choosing the placement multipliers, whether you’re doing them yourself or you’re having Amazon manage them for you, and then from here, it’s turning on and off that budget based on where you want to target spending those campaign dollars.
You know, come at nine in the morning when I’m first getting into work, I like to scroll through Amazon, get myself prepared for the day, and I might just be clicking on products, but I’m not in that buy period or that buy mode right now. It’s not until I get home it’s 6:00 and I’m ready to go ahead and make that decision and actually click and spend that money on the products that I was searching through throughout the day. I want to be able to target when I’m going to be having not just the greater volume, but also the greater chance to actually get those sales, and we help with adjusting that and even reallocating unspent budget from periods where you’re having less traffic to the periods where you’re having higher traffic, so you have less issues with gapping while still not overspending on that set budget range that you want for the weekly and monthly limits inside of the system.
Now, to get a better idea on where and how we should apply those rules. Obviously we have all of those different reports where you’ll be able to see the daily reports. We do consolidate those daily reports as well, specifically under the orders page, where you’ll be able to sort and filter for the various orders that we’re attributing to all of these different ad campaigns, and then from there, actually see when and how many orders are coming in so that you can make those adjustments, based on the different time periods, the heat map that we’re going to be providing, where you’re actually getting these sales against what campaigns.
Now, for the Walmart side of things when you’re going to be managing it. So again, we have the Amazon. That’s going to be where you’re going to be able to build new campaigns, and you’re going to have all of the various reports, whether you’re looking at the campaign reports. We also have reports for keywords inside of the system to give you better visibility on the Amazon campaigns. We’re also going to be connecting with Walmart. Now, Walmart currently is just there for the reporting. They are adding in the new features and things like that, where you’ll be able to actually build new campaigns and manage the different rules, like we showed you on the Amazon side of things. But currently Walmart’s here just for the reporting.
So similar to what you’re seeing on Amazon. We’ve got our sales. We’ve got our cost. We also have a bunch of other information. So as for the listings, Amazon or I apologize, Walmart does send us information like top search trends and our recommendation report. They’ll recommend products that you’re currently selling that you might not be managing a campaign on that you would get some benefit from based on different keywords or different companies that are selling in similar categories.
Top search trends allows you to look up those various keywords that you might want to be applying to your campaigns, and see the different conversion share and things like that. What other companies might be selling under that campaign to make sure that you are in a related field or you’re actually competing against the different brands or different companies that you want to in those certain categories.
As we grow Clocklocked, and if you guys have questions, always feel free to talk to your account managers. It is a fairly easy process to get set up with Clocklocked as well. If you go to our help page there’s guides on how to get it done. But if you want to just get started, it’s just app.clocklocked.com and you’ll be able to go ahead and register right for Clocklocked and set up the account. As long as like I said, you have an active Sellercloud subscription, you’ll be able to get the free version and then you can always update from there, right through our settings page inside of the Clocklocked UI.
Gary Basko
Let’s go ahead and go into the actual Q&A. I do see there’s a number of different questions that our customers have asked. So we’re going to start with the very first one. I don’t think you can create a new product on Sellercloud for Amazon if the product does not have a ASIN. We normally have to create the listing on Amazon first. Can you clarify and show how to do it? So previously that was true. That was actually something that we added in. I think we set up the mapping right before our user conference. So that was back over in February. So it’s been about six to seven months that we’ve had the capability inside of Sellercloud to post brand new products from Sellercloud and get the ASIN.
Now it’s very similar to what Rick was showing you inside of the system, where we have the different product details on there, but after that, the information that needs to get put in there, everything that is required is done by clicking Post Product On Amazon. What it will do is it’s going to create the new product on Amazon, it’ll create the ASIN on Amazon, and then Sellercloud is going to pull that right into the system. We just need the minimum required information. To make sure if there is anything or if there is any issues when you’re trying to create that new listing on Amazon, we added in what’s called a channel posting log. This is what’s going to give you the requests and the responses. So what we’re asking Amazon from and then they’re responding back to us through the API, so if there’s any issues that we’re missing or anything on there, it’ll actually let us know so that we can update and then retry to post that product to Amazon.
Now for Walmart. What is the alternate path other than posting by match through Sellercloud? I didn’t quite catch the second way to list on Walmart. So set up by matches if you’re a reseller, there’s already an existing listing. If you’re a private label company or you’re posting like a brand new listing to Walmart, on there, it’s very similar to what we just went through with the Amazon side of things. So inside of the product screen we have a Walmart’s properties page. We just need to make sure that the required information that Walmart needs is in there, and once it’s ready, instead of going ahead and say post set up by match, we’re just going to be doing the Action Post update on Walmart, and this will go ahead and create a new Walmart listing. Same thing for eBay, same thing with say like the Shopify and the various other channels that you might be integrating within Sellercloud where we have product posting capabilities.
Is it possible to cover the custom reporting functionality in Sellercloud? So there’s a lot of custom reporting functionality in Sellercloud. I’m not sure if we’re gonna have full time to go through that. I’m not sure what type of customer reports you’re looking for. As for custom reports, I highly recommend if you are looking for more details on the reports, we actually did a webinar back in July. It was recorded, so you can go back and actually check out all the different reporting, custom reporting and everything that we went through and how to build those different reports, even how to automate getting those reports emailed to you for the stuff that’s going to be, most important for you or for outside team members that might be, needing to access the Sellercloud account.
Does Imagebridge come with a Sellercloud account or is there a fee involved? Imagebridge is included with Sellercloud. We obviously want to help you get your listings up on there. That all turns into more orders. So Imagebridge is included as part of the Sellercloud monthly subscription. There’s no extra cost. Feel free to download that. You can get it right from our support page.
How can I list items onto Walmart from Sellercloud with variations? So with the variations inside of the system, what we have to do, we’re going to start with a parent. So maybe I want to sell this, but I don’t want to sell this with just the four, pumpkin Thanksgiving wooden tables. Maybe I also want to sell a two pack of it. I want to sell a 12 pack of it and so on and so forth. So I want to have the two pack, the one pack and the four pack all together. Variations we’re going to be looking at are the dimensions and the values into the system. So these themselves are actually individual products that are tracking inventory inside of Sellercloud. But when we’re going to be posting the actual variation from Sellercloud to Walmart, we’re going to need to make sure that we’re posting it as the parent to Walmart, which will then unify all of these child SKUs. The actual variant SKUs that you’re going to be tracking inventory for, so when customer A buys the XL versus the three XL and so on and so forth, you’re getting the order for the correct product to ship to the correct customer.
But once you’ve created the actual variation listing, this will create the child SKUs on there. So we’ll go ahead and we can even do that right now. Now, because as when you’re dealing with variations, I might have different pricing, and they are technically their own SKU, I may have to go in and update information on the variant level to make sure that I have the details that Walmart requires for each individual variant. So that is just something to keep in mind when you are creating or posting new variations, since they are technically their own product, their own SKU. If I click on this, I need to have separate dimensions or weights and values and stuff like that. I may have a different price for the large than I do for the small because the amount of material that I’m using and so on, so forth. I would have to update some things individually, depending on what I want to be pushing to the channel when I go to actually post the variation apparent to the marketplace.
All right. It looks like that’s all the questions that we have so far. We do have a few more minutes, so we’ll, we’ll hold off. If anybody has any questions, feel free to add anything into the Q&A section.
Rick Gandhi
And Gary, while we’re waiting, one thing I forgot to mention, if you want to just show them under the catalog and the tools, we offer the templates for the shadows and the kits and the variations. So you guys are able to do this in bulk.
Gary Basko
Preset up templates for shadows. For the variations, we have preset up templates that you can download. Same thing for the kits and the bundles. With shadows you can even do that directly through the manage page. I could select SKUs and I can create shadows in bulk.
If you’d like to touch on anything regarding custom reporting, one of the ways that Sellercloud users will use this manage page for certain custom reporting features or functionality. It’s done with the custom filters. So I have like status filters that I can search for. I have Amazon statuses, I have eBay statuses, Walmart statuses, and things like that based on what I want to track inside of my system, so maybe I’m the one that is actually managing creating the listings. So I want to see what products aren’t ready on the channel, so I know which ones that I have to update certain information. Maybe I want to track which ones already, but they’re not posted yet. Which ones are ready but they’re not enabled. So I can make sure that I’m tracking and monitoring my listings. And then if Amazon does change anything or a listing for some reason does get taken down, I can go ahead and track that inside of the system to see any of them that are ready. But they’re not enabled for certain reasons, they’re not posted, they’re not active.
When I made a Clocklocked account with Sellercloud, I’m getting a ‘something went wrong log in again’ error. If you can, I’m not sure who your account manager is, but if you can reach out to them, we can definitely schedule a call. I wouldn’t mind getting on a call with you, and we can go through that together at the same time, answer any questions that you might have. So I highly recommend reach out to your account manager because they’ll be more than happy to get that set up for you.
What exactly is Imagebridge? That is a fantastic question. So Imagebridge is a image editing solution that we offer. Imagebridge is something that you would download directly to a computer. You can have as many installations of Imagebridge as you want, and each of the channels has different size requirements or resolutions and things like that that either work best with the platform or they require specifically. When I take a image, before I get it into Sellercloud, I may want it to be resized and have these different sizes resolutions specific to the channel. So we have your regular product images, and then we have channel images inside of the system that we save as well. If in case I wanted certain images or certain configuration on those images for Amazon versus eBay versus Walmart.
This is also great in case you are a private label company. If you’re handling that, you can set up and add watermarks on those images. So if people are, say, taking those images to reuse other places, you’ll be able to track and know who is using your content. Other places. But Imagebridge is free with Sellercloud. Highly recommend downloading it, especially if you are hosting products from Sellercloud to these channels, it’ll help with all of the actual image editing ahead of time.
Where can I download Imagebridge? All right, give me one second, I’ll actually put out the link real quick. So you can find it right on the Sellercloud support portal. This is also where you can find other applications as well too. So Shipbridge, Imagebridge, Receivebridge, Quickbridge, Skustack, 4D Scale. If you’re not already set up or registered for the support portal, I highly recommend setting up and registering, getting account for the support portal because this is also going to be very helpful.
Yes. Imagebridge does trace backgrounds. That was the last question that somebody just put. Does Imagebridge erase backgrounds? Yes, it’ll help with that. But yeah, you’ll be able to download the other applications that we have inside of there, not just Imagebridge or Shipbridge, Receivebridge in case you’re needing a receiving or a shipping software as well. Those are both included applications as part of the Sellercloud subscription.
Then if you have questions on Imagebridge or what you’re going to be using it for, obviously always make sure to talk to your account manager. They can talk to you about and discuss different resources. You know, whether you might need to say Premium support or something like that for a month, to help work with you to get the catalog and everything set up, get your Clocklocked account set up if you’re looking to get Clocklocked going, and so on and so forth.
Alright, so I think that’s the last of our questions. I’m going to thank everybody for joining us today. Rick, thank you as well for a fantastic presentation. If you guys have questions, feel free to reach out. Like I said, our support team, our account management team, we’re here for you. We’d love to help. We’ll be obviously doing additional webinars as well in the future, so feel free and make sure to attend those to see all the new and fun upcoming features that we have. Otherwise. Again, we’d like to thank you for your time and we hope you have a great rest of the day.
Rick Gandhi
Thank you everybody.