Overview
Sellercloud allows you to export order information into files. This can be useful for multiple reasons – most commonly, syncing with third-party services or backing up your data. In this article, you will learn how to export orders and understand the different export options.
Export Options
There are different ways to export orders from Sellercloud. The table below describes each option:
| Order Export Method | Exported Data | Supported File Formats | Additional Customization |
| Standard Format | This option exports a predefined set of the most commonly used Sellercloud order data. You can’t determine which specific data to export. |
|
Not possible. |
| Export Mapping Tool | This option exports a custom set of Sellercloud order data that is based on your selected Export Mapping Profile. For details about the order data you can export, see Export Mapping Columns. |
|
Not possible. |
| Plugin | This is the most flexible option. When the above options are not sufficient, you can request a custom plugin that exports any order data of your choice. Building a new customization is considered a billable service. See Sellercloud Pricing for more information. | The file type of the export is based on your plugin. | Open a ticket to Sellercloud Support with your requirements, and you will receive an estimate of the final cost. |
Standard Format Columns
The Standard Format export option uses a template that provides the following order information:
Export Orders
You can export orders manually with an action or automatically with a Scheduled Task. Both options require you to select one of the Export Options described in the previous section.
Manually
To export a single order:
- Go to the Order Details Page.
- Click Actions and select Export Orders.
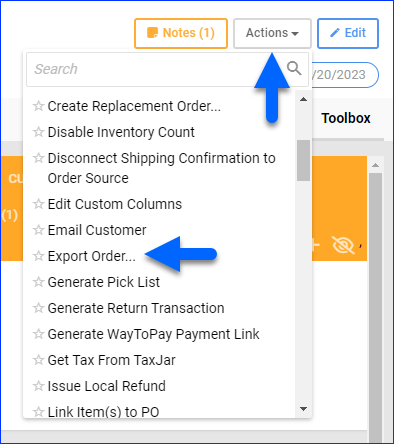
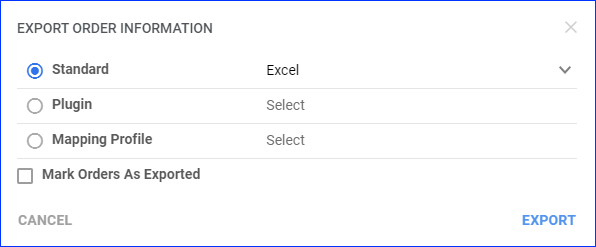
- Select from these options:
- Standard: For a standard export, select Standard and choose your desired file type.
- Plugin: For a plugin export, select Plugin and then choose the plugin.
- Mapping Profile: For a mapping profile export, select Mapping Profile and then choose the profile.
- Optionally, check Mark Orders as Exported if you need to track which orders have been exported. This changes the value of the Is Exported status to True.

- Click Export, and a Queued Job will be created.
- Next, you have two options:
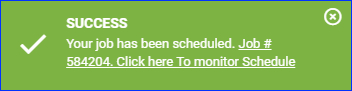
- Click the link in the success message at the bottom of the screen to access the Queued Job. Once the job finishes, you can refresh the page and click the Download icon to the right of the Output File.

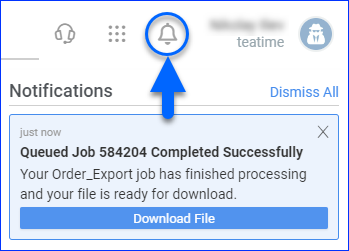
- Wait for the Notification, which confirms that the job has been processed, and click Download File.
- Click the link in the success message at the bottom of the screen to access the Queued Job. Once the job finishes, you can refresh the page and click the Download icon to the right of the Output File.
To export multiple orders:
- Go to Orders > Manage Orders.
- Find and select the orders.
- Click the Actions button and select Export Orders.

- Select from these options:
- Standard: For a standard export, select Standard and choose your desired file type.
- Plugin: For a plugin export, select Plugin and then choose the plugin.
- Mapping Profile: For a mapping profile export, select Mapping Profile and then choose the profile.
- Optionally, check Mark Orders as Exported if you need to track which orders have been exported. This changes the value of the Is Exported status to True.
- Click Export, and a Queued Job will be created.
- Next, you have two options:
- Click the link in the success message at the bottom of the screen to access the Queued Job. Once the job finishes, you can refresh the page and click the Download icon to the right of the Output File.
- Wait for the Notification, which confirms that the job has been processed, and click Download File.

- Click the link in the success message at the bottom of the screen to access the Queued Job. Once the job finishes, you can refresh the page and click the Download icon to the right of the Output File.
Automatically
To automate an order export:
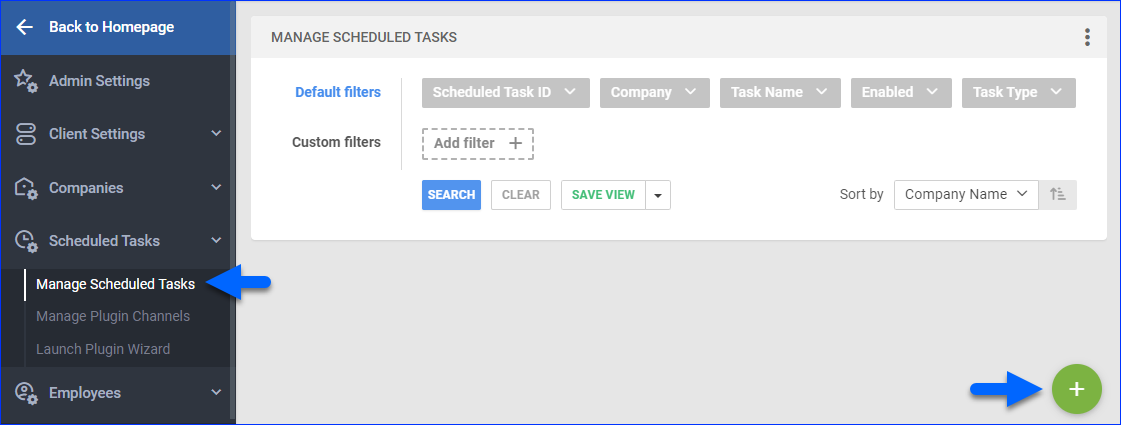
- Navigate to Settings > Scheduled Tasks > Manage Scheduled Tasks.
- Click the green + icon: Create New Scheduled Task.
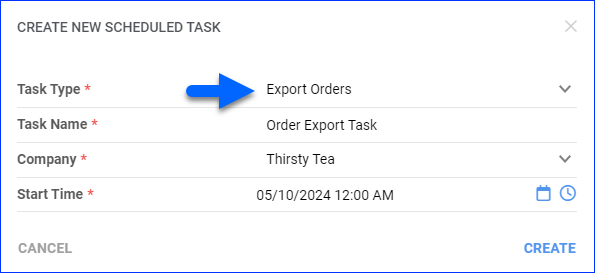
- Complete as follows:
- Click Task Type and select Export Orders.
- Set the Task Name.
- Select the Company.
- Select the Start Time.
- Click CREATE.
- Click the link in the success message at the bottom of the screen to configure the task details.

- Click the Edit button on the top right.
- In the Details section:
- Click the User ID menu and select your username.
- Click the Saved Search menu and select a Saved View created to target specific orders.
- Click the Export Via menu and select General Format to export common order data to an Excel spreadsheet in .xlsx format. You can also select a Plugin or a Mapping Profile.
- Optionally, you can check Mark Orders As Exported if you need to track which orders have been exported. This will change the value of the orders’ Is Exported status to True.
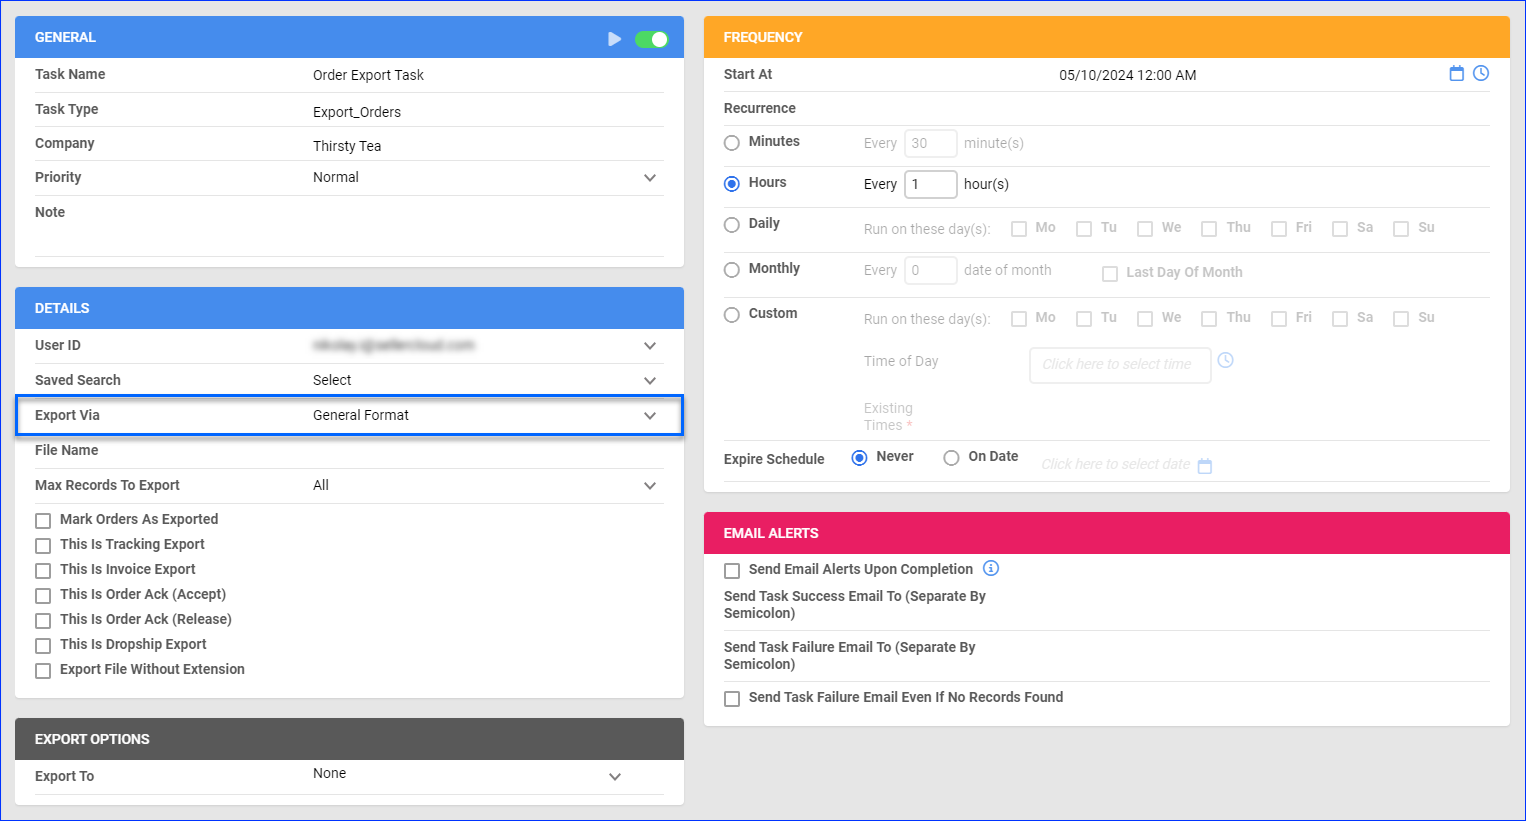
- Configure the Export Options section per your preference.
- In the Frequency section, specify the task frequency.
- In the General section, click the Enable toggle button.
- Click Save on the top right.
Related Client Settings
These Client Settings affect order exports:
- Export Kit Parent Only When Exporting Orders – When you export orders with Kit Products, kit components will be excluded from the file, and only the kit parents will be included.
- Show Zero Price For Kit Items In Order Export – When you export orders with kit products, the prices of the kit components in the exported file will be 0. This setting doesn’t affect the prices of kit parents.
- Enable Order Exported Workflow – Enable the Is Exported order status and its associated actions on the Order Details Page (Set Exported and Set Not Exported), the Manage Orders page, and the checkbox Mark Orders As Exported on the scheduled tasks page. This status can also be updated with the Order Rule Engine.
- Always Mark Orders Exported After Generating Order Export File – When you export orders to a file, the orders’ Is Exported status will be set to True.
- Mark Orders As Expoted When Exported Via Scheduled Task – When a Scheduled Task exports orders to a file, the orders’ Is Exported status will be set to True.
- Default Order Export Plugin – Set a default plugin that will be automatically preselected each time you export orders. You can still view your plugins list and manually select any other plugin from it.
- Enable Order Export In Yugster Format – Enable the Export in Yugster Format action on the Manage Orders page, which exports orders in a .csv format with headers compatible with UntilGone. See UntilGone Account Integration to learn how to fully integrate this channel.